
Residential aircon installation Singapore looks like a half-day drilling job from outside. The reality is more layered, and the steps installers skip on tight schedules are exactly what determines whether the system lasts. This blog will walk you through what aircon installation Singapore actually involves at the residential level, realistic timing, and what homeowners miss on install day.
BTU sizing: getting this wrong wastes money for the next 8 years
The single most expensive mistake in residential aircon installation is wrong BTU sizing. Oversize the unit and you pay for cooling capacity you’ll never use, plus higher upfront cost and shorter compressor life from constant cycling. Undersize it and the unit runs flat-out 24/7 in Singapore’s heat, never reaches the set temperature, and dies in 4 to 5 years instead of 8 to 10. The basic rule is BTU per square metre, adjusted for sun exposure, ceiling height, and occupancy. For typical Singapore residential conditions:
| Room type | Approximate area | Recommended BTU |
| HDB common bedroom | 8 to 12 sqm | 9,000 BTU |
| HDB master bedroom | 14 to 18 sqm | 12,000 BTU |
| Condo master bedroom (high ceiling) | 16 to 22 sqm | 15,000 to 18,000 BTU |
| Open-plan living/dining | 25 to 35 sqm | 18,000 to 24,000 BTU |
| Penthouse living room with full glazing | 35 to 50 sqm | 24,000 to 30,000 BTU |
Two adjustments are worth knowing. West-facing rooms with afternoon sun exposure typically need 10 to 15% more BTU to handle the extra solar load. Rooms with ceilings above 3 metres also need scaling up. Singapore’s standard HDB ceiling is around 2.6 metres, so this is mostly a condo and landed property issue.
The system type follows from the BTU total, not the reverse. A typical 4-room HDB with three bedrooms plus a living room won’t fit on a single split, but a System 3 with a 24,000 BTU outdoor condenser usually handles it. A 5-room HDB or 3-bedroom condo typically needs System 4. For larger condos and penthouse layouts, the small office and home installation considerations cover the threshold where multi-split installs stop being economical.
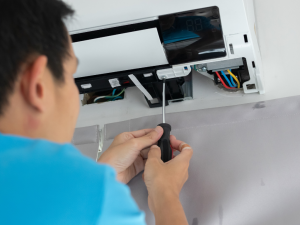
The residential aircon installation process step by step
A proper residential installation runs through 9 stages, all of which matter. Skipping any of them shortens the unit’s life or violates compliance.
1. Pre-install site visit
The installer measures rooms, checks the ledge or balcony location, inspects the electrical distribution box, and photographs the trunking route. For HDB, the installer also confirms main switch capacity (30A vs 40A determines maximum outdoor unit weight). Takes 30 to 45 minutes.
2. Bracket and ledge prep
For HDB units with an existing aircon ledge, the installer inspects load capacity and bracket condition. Older units without a ledge get a stainless steel bracket (Grade 304 minimum) fitted to the wall in HDB-approved positions. Takes 30 to 60 minutes if drilling is involved.
3. Indoor unit mounting
The fan coil mounting bracket goes on the wall first, levelled to within 1 to 2 millimetres. The indoor unit hangs on this bracket. Wrong levelling causes drainage problems for the lifetime of the unit.
4. Outdoor condenser placement
The condenser sits on the bracket or ledge, on rubber damping pads to absorb vibration. For multi-split installs, the condenser handles 2 to 4 indoor units, so placement affects piping length to all rooms.
5. Copper piping run
Refrigerant piping connects indoor to outdoor units, insulated end-to-end with closed-cell foam to prevent condensation on the copper. The trunking route is finalised here, with bends minimised for refrigerant flow efficiency.
6. Drainage line installation
This is where shortcuts cause leaks for years. The drainage pipe needs a continuous downward gradient of at least 1 in 100 (1 cm drop per 1 metre of pipe). HDB rules require discharge into an internal floor trap, not the external wall.
7. Electrical connections
The indoor unit connects to a dedicated isolator and through a Miniature Circuit Breaker (MCB) at the distribution box. Any new circuit needs an EMA-licensed electrical worker. Existing circuits get re-checked for amperage rating.
8. Vacuum test
Before refrigerant goes in, the pipe network is evacuated to remove air and moisture. A vacuum pump pulls the system down to 500 microns (0.5 Torr) or below, holds for at least 15 to 30 minutes, and confirms no leaks. Skipping or rushing this is the single biggest install-day shortcut. The vacuum and pressure testing service describes the standard. Trapped moisture damages the compressor over months and voids most manufacturer warranties.
9. Gas charging and commissioning
Refrigerant is charged to manufacturer-specified weight, not “until it feels right”. Modern R32 units often come pre-charged for piping under 7.5 metres total length. Anything beyond requires top-up calculated by pipe length. The aircon gas top-up procedure covers the calculation. After charging, the unit runs for 15 to 30 minutes for commissioning, with gas pressure, current draw, voltage, fan rotation, drainage flow, and cooling output measured and recorded. The installer then submits Form AC-01 (private property) or Form AC-02 (HDB) within 14 days.
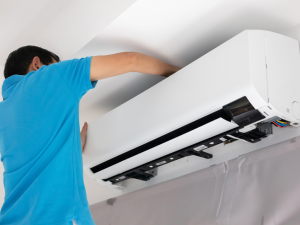
Aircon installation timeline in Singapore
Realistic installation times by setup, assuming the property is prepped:
| Setup | Typical install time | Notes |
| Single split (System 1) | 4 to 6 hours | One indoor and one outdoor unit |
| System 2 | 6 to 8 hours | Two indoor units, one outdoor; usually fits in a day |
| System 3 | 8 to 10 hours | Full day; sometimes spills into a second morning |
| System 4 | 1 to 2 days | Particularly if trunking runs are long |
| Ducted central system | 2 to 3 days | Includes ceiling work and duct installation |
If a contractor quotes “5 hours” for a System 3 install, expect at least one of these to be skipped: the vacuum test, full pipe insulation, drainage gradient setup, or commissioning. Speed at the install stage gets paid for in the years that follow. For replacements where some infrastructure can be reused, the timeline shortens, but only if the existing piping is verifiably sound. The aircon replacement decision framework covers when reuse is safe and when it isn’t.
What most homeowners get wrong on install day
Five mistakes I see weekly across HDB and condo installations.
Not being home for the site visit
Sizing decisions get made on assumptions when nobody’s there to point out which rooms get afternoon sun and where furniture sits. Skipped site visits lead to wrong-sized units, awkward placement, and trunking through inconvenient spots.
Allowing reused copper piping during replacement
Old copper has internal residue from the previous refrigerant, possible micro-cracks from pressure cycling, and uncertain insulation integrity. Budget installers reuse it to save S$200 to S$400 on materials. The new compressor sees contamination from day one. New copper is the only reliable choice for a fresh install.
Not witnessing the vacuum test
Stand near the outdoor condenser and watch. A real vacuum test runs the pump continuously for at least 15 to 30 minutes after reaching 500 microns. A fake test runs for 2 to 3 minutes, then opens the gas valve. The fake version is invisible in the finished install but cuts compressor life.
Accepting verbal warranty terms
Manufacturer warranty (typically 1 year parts, longer on compressor) is separate from installation warranty (typically 1 year on workmanship). Both should be in writing, with specific terms. Verbal “we’ll come back” promises don’t survive contractor turnover.
On-the-fly placement decisions
“Where do you want the indoor unit?” asked at 10am on install day usually produces a poor answer. Indoor units need airflow clearance, filter access, distance from heat sources, and unobstructed throw to the seating area. Trunking routes should be planned during the site visit and approved by you in writing before drilling starts. Decisions under time pressure get lived with for 8 years.
The fix for most of these is upstream: get an install quote that specifies BTU calculation, vacuum test, and new copper in writing before any work starts. For homeowners who’ve already experienced one of these mistakes, scheduled aircon servicing at the standard 3 to 4 month interval can mitigate some damage. Some shortcuts can’t be undone.
Verifying your installer is BCA-licensed and NEA-certified
Installation requires more credentials than servicing. Four checks before booking.
BCA-trained aircon installer
BCA’s air-conditioning safety guidelines require all aircon installations on the exterior of any building to be carried out by a BCA-trained aircon installer. The installer carries an identification pass and is registered with BCA. Ask for the registration reference for the technician on your job, not just a generic “we’re licensed” claim.
NEA Refrigerant Practitioner
Anyone handling R32, R410A, or any other refrigerant needs Refrigerant Practitioner certification under Singapore’s regulated refrigerants framework. Training is delivered through BCA Academy. Gas charging without this certification is a regulatory violation, not a grey area.
EMA Licensed Electrical Worker
Required for any new aircon circuit, isolator switch installation, or modification to the distribution panel. For a brand-new aircon install, an LEW must be on the team or supervising remotely.
Form AC submission
Within 14 days of installation, the BCA-trained installer must submit Form AC-01 (private property) or Form AC-02 (HDB). This documents the install and the installer’s credentials. If your installer can’t tell you which form they’ll submit, treat that as a warning sign. For post-install pricing context, the general aircon servicing pricing guide covers typical Singapore rates.
Conclusion
Residential aircon installation in Singapore is a 4 to 24 hour job, with 9 distinct stages each carrying real consequences if rushed. The vacuum test, drainage gradient, bracket integrity, and gas charging by weight (not feel) separate an 8 to 10 year unit from a 4 to 5 year one. Witnessing the work and asking about Form AC submission shifts the conversation from “trust me” to “show me”.
If you’re planning to book an installation or replacement before peak season, get the site visit and quote in writing first. SACES handles HDB, condo, and small commercial aircon installation across Singapore with BCA-trained installers, certified Refrigerant Practitioners, EMA-licensed electrical work, and full documentation. Speak to the SACES team about your aircon installation.
FAQ About Residential Aircon Installation Singapore
How long does residential aircon installation take in Singapore?
For a single split unit, 4 to 6 hours. A System 3 typically takes a full day (8 to 10 hours), and System 4 setups can run 1 to 2 days depending on trunking routes. Ducted central systems take 2 to 3 days. If a contractor quotes 5 hours for a System 3, key steps are likely being skipped.
What is a vacuum test and why does it matter?
The vacuum test removes air and moisture from refrigerant piping before gas is charged. The pump pulls the system to 500 microns or below for at least 15 to 30 minutes. Skipping this introduces moisture that damages the compressor over months. It’s the most important install-day step homeowners often miss.
Do I need a BCA-licensed installer for residential aircon installation?
Yes. BCA’s air-conditioning safety guidelines require all installations on the exterior of any building to be carried out by a BCA-trained aircon installer. The installer must also hold NEA Refrigerant Practitioner certification for handling refrigerants like R32 or R410A. Form AC-01 (private) or AC-02 (HDB) gets submitted within 14 days.
How do I know if my installer chose the right BTU?
Standard sizing is 9,000 BTU for an 8 to 12 sqm bedroom, 12,000 BTU for a 14 to 18 sqm master, and 18,000 to 24,000 BTU for an open-plan living area. West-facing or high-ceiling rooms need 10 to 15% more. Wrong sizing shows up as constant cycling or never reaching set temperature.
Should I let the installer reuse old copper piping during replacement?
Generally no. Old copper has internal refrigerant residue, possible micro-cracks, and uncertain insulation. The S$200 to S$400 saving isn’t worth contaminating a fresh compressor. New copper is the standard for any installation that should last 8 to 10 years.